Ultimate site migration SEO checklist: How to prevent traffic loss

What makes an enterprise CMS AI-ready?
Site migration is one of the highest-risk events for organic search traffic. A study of 892 domain migrations found the average recovery takes around 523 days, and 17% of sites never fully recover. Incomplete redirect mapping is responsible for most migration failures.
This checklist covers what to do before, during, and after a site move to protect your rankings:
- Before launch: crawl and export all URLs, set up a staging environment, benchmark your Analytics data, and map old URLs to new ones.
- At launch: migrate during low-traffic hours, implement 301 redirects per your URL map, submit a new sitemap, configure Google Search Console for the new domain, update internal links, and reach out to update external backlinks.
- After launch: crawl again for 3xx/4xx errors, verify tracking tools are firing correctly, check site performance, and monitor organic traffic daily for at least one week.
One area not covered by this checklist: preserving AI citation visibility. With AI-powered search surfaces such as Google AI Overviews and Perplexity now summarising content from indexed pages, maintaining structured data markup (FAQ, HowTo, Article schema) through a migration has become an additional consideration worth raising with your SEO team.
Migrating a website is often a necessary step in a digital marketing strategy or during a major revamp, especially when your current platform or CMS no longer meets your needs, prompting you to migrate your website to another platform. This requires a combination of resources from digital marketing (including SEO and analytics) and web development teams. Without a well-organised site migration SEO plan, the migration process can have a significant negative impact on your website and its search rankings. (including SEO and analytics) and web development teams. Without a well-organised site migration SEO plan, the migration process can have a significant negative impact on your website and its search rankings.

What is website migration?
Website migration or site migration refers to a process of making major changes to a website including URL, design, content, and structure. In simple terms, it describes moving your site and/or its contents from one place to another, usually involving changes to at least part of the URLs. It has to be planned and executed carefully, with a clear site migration SEO checklist, to avoid losing traffic, search engine rankings, and revenue.
There are several common reasons to migrate websites. If your business is rebranding, you may need to migrate to a new URL to match the new brand identity. When the interface of your website is no longer user-friendly, a revamp of the site’s structure might be needed.
Website migration usually involves several steps. The most important one is figuring out the reasons for the migration and then making a detailed plan. Referring to Niteco’s pillars of content migration at the beginning can help to save time and avoid confusion.
If your migration involves moving to a new CMS or digital experience platform, read our guide on what website replatforming involves and when it makes sense before starting your planning. Understanding the full scope of a replatform helps clarify which parts of this checklist apply to your situation.
Why do you need to consider SEO in a website migration?
Migrating a website without considering SEO can have significant negative consequences.
1. Temporary loss of traffic
Site migration almost always results in a temporary loss of traffic. It’s not abnormal to see a small decline in organic traffic in the short run. Any time you change the domain, content, design, or other significant features of a website, Google needs time to recognise the change and update its index. To minimise traffic fluctuation and make it easier for Google to crawl and index your website correctly, you need an SEO plan.
Research on 892 domain migrations found the average traffic recovery period is around 523 days, and approximately 17% of sites never returned to pre-migration traffic levels. Well-executed migrations with complete redirect maps can hold traffic stable, but the data illustrates the downside risk of cutting corners.
2. Drop in search rankings
If you choose the wrong kind of redirect when migrating to a different URL or do not redirect correctly, your search rankings may be negatively impacted. There are two major types of redirects: 301 and 302 redirects. A 301 redirect is used when a page has been permanently moved to a new location, whereas a 302 redirect is used when the move is temporary. Choosing the wrong type can cause search engines to treat your content incorrectly, and your website could disappear from search results for months or even years.
A documented 2025 example from a Volusion-to-Shopify replatform shows what poor redirect mapping costs in practice: organic clicks fell from roughly 1,200 to around 500 per day after long redirect chains were created and critical 301 mappings were missed entirely. The platform change was not the cause. The incomplete redirect map was.
3. Hard for Google to crawl
If the website’s sitemap is not updated throughout the migration process, it becomes much more difficult for Google to crawl. As a result, not all of the website’s pages may be indexed, which can seriously harm search engine rankings.
These are just three of many possible negative consequences of migrating a website without an SEO strategy. Creating a well-tailored website migration plan is a key component of maintaining your positions in search results.
As an example, read how Niteco managed to bring more traffic and conversions for 15 Electrolux websites with our SEO services.
For teams planning a full platform switch, our article on common pitfalls in website replatforming covers related risks outside pure SEO — including content structure, integration mapping, and timeline planning.
Site migration SEO checklist for the preparation stage

Step 1: Set up a staging site
A staging site is a duplicated version of your new website that is not accessible to the general public. It allows you to test changes without affecting the live website and gives you an opportunity to preview and test before going live.
Any changes applied to the live website can result in downtime, which can disrupt visitors. A staging site lets you make changes without that risk.
Remember to block staging sites from being crawled by search engines using robots.txt. This keeps your staging site private and only accessible to authorised users.
Step 2: Crawl your site and identify important URLs to avoid losing them
A site crawl allows you to scan your website and identify all URLs. Make sure you have a complete list of URLs from your old website before migrating. You can then map old URLs to new ones in your 301 redirect mapping.
You can also use this opportunity to identify any crawl errors or incorrect redirects already present on your old website or staging site.
Step 3: Benchmark important data from Google Analytics, Google Search Console, or any other tracking tool
Benchmarking gives you a baseline for the website’s performance. By comparing data from your old site with the new site, you can identify precisely how much traffic you lose and which pages are affected.
Benchmarking also helps you optimise the new website by providing insights from user behaviour on both the old and new sites.
As part of your pre-migration baseline, it is worth capturing Core Web Vitals scores — particularly LCP (Largest Contentful Paint) and INP (Interaction to Next Paint) — so you can benchmark page speed performance before and after the migration. Note: INP replaced FID as a Core Web Vital in March 2024, so ensure any older performance reports are re-run against the current metrics.
Step 4: Map old URLs with new URLs to avoid 404 errors
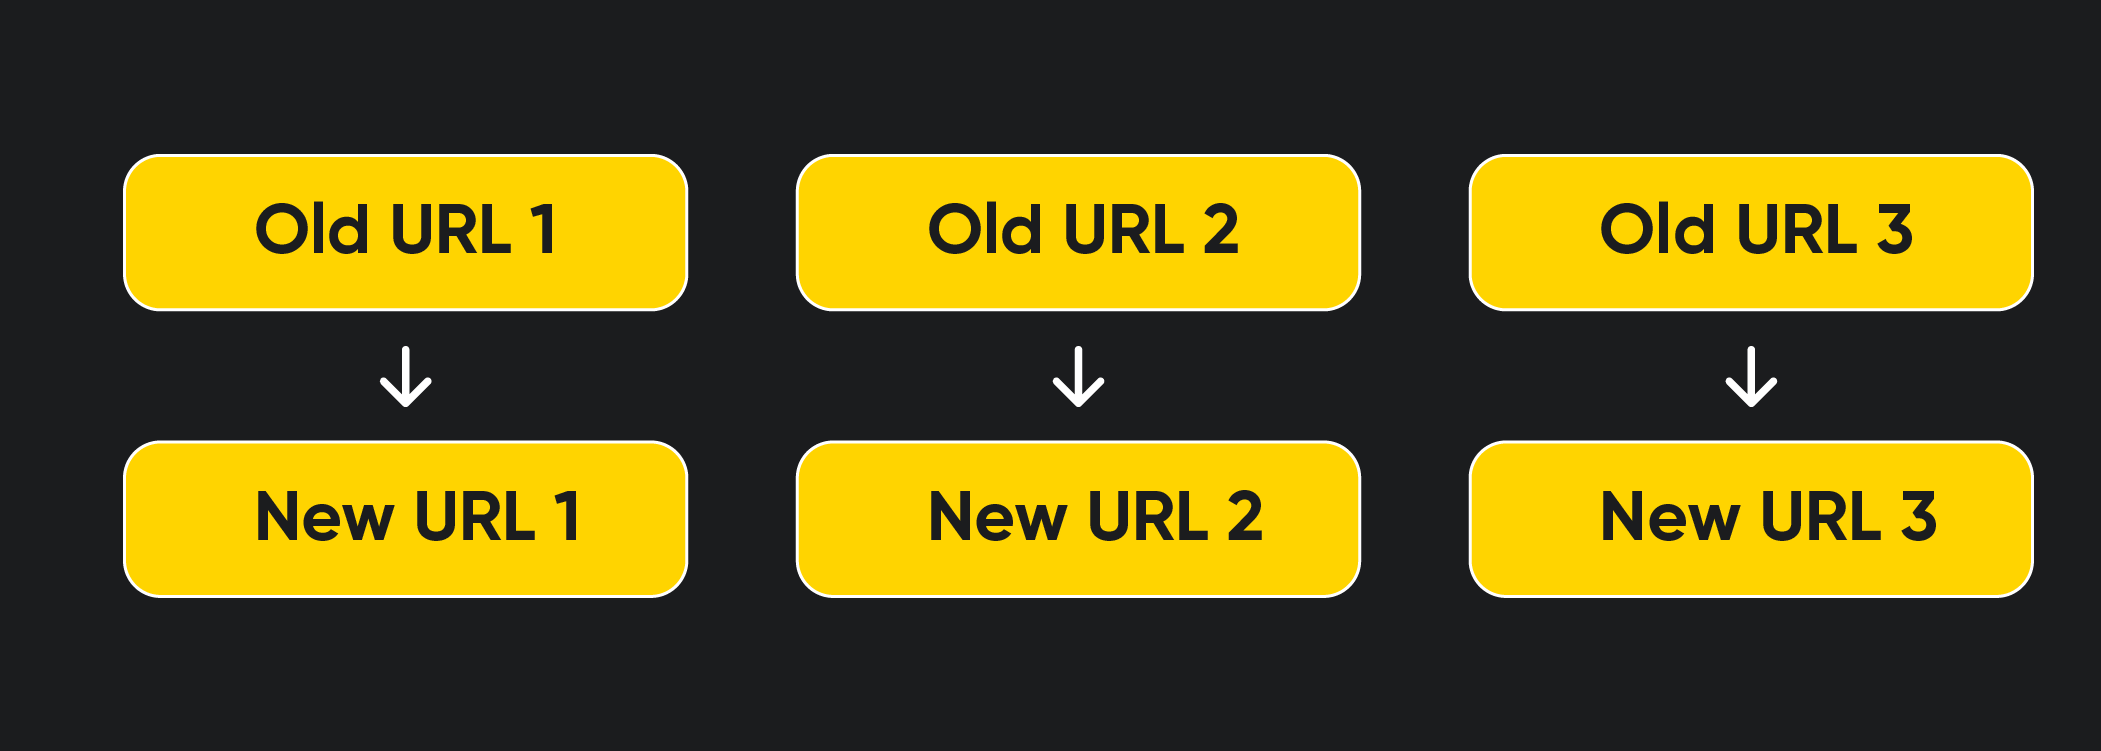
Old URLs should be mapped to new URLs in an Excel file or database so you can keep a record of the mapping process and refer to it if any issues arise during or after the migration. Without these redirects, visitors and search engines will encounter a 404 error page when trying to access the old URL, resulting in major negative impacts on your search rankings.
Be extra careful when revamping page structure or creating new pages. If old content is incorrectly mapped to new pages or pages are combined, this could result in duplicate content, which can confuse Google and seriously harm your website’s rankings.
Site migration SEO checklist for the implementation stage
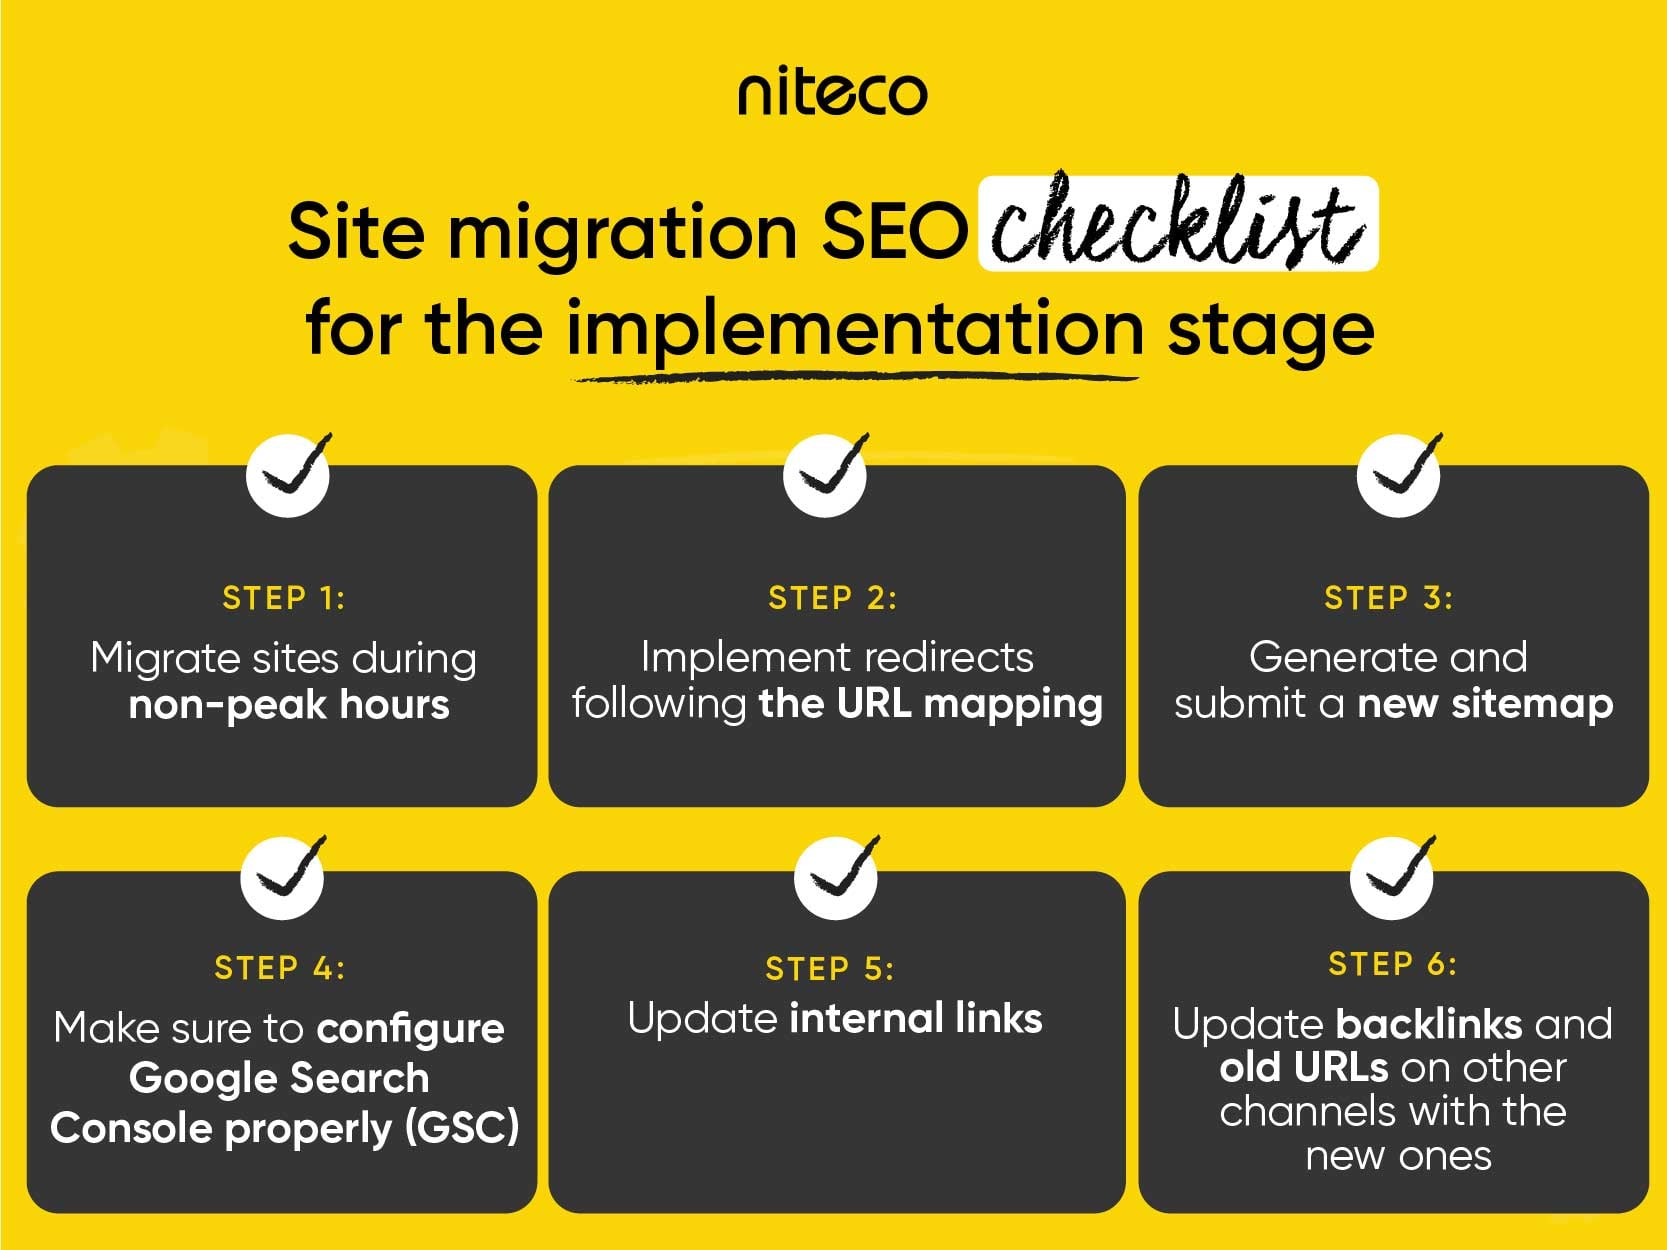
Step 1: Migrate sites during non-peak hours
The migration process often involves temporary downtime or slow loading times. To avoid disturbing visitors or losing revenue, do not migrate at times when website traffic is high.
Website migration is a complicated process, which means errors or issues might arise. Migrating during non-peak hours gives your team more room to catch and fix problems before they affect a large number of visitors.
Step 2: Implement redirects following the URL mapping
Implement redirects following the mapping of URLs. This ensures that the old URLs are correctly redirected to the new ones and your users will not encounter any 404 errors. If you are an SEO specialist or a digital marketer, make sure that you have discussed this with the web development team before migrating.
Avoid creating redirect chains, where URL A redirects to URL B which then redirects to URL C. Each additional hop dilutes link authority and increases load time. Update internal links to point directly to the final destination URL wherever possible.
Step 3: Generate and submit a new sitemap
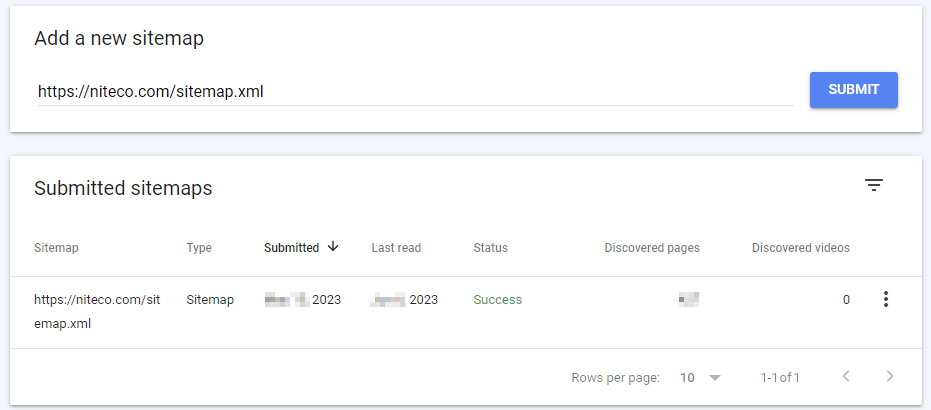
Submit the new sitemap as soon as the website goes live, as Google quickly detects changes. Use a sitemap generator tool or have your development partner create one. The sitemap should include all new URLs. Submit the new sitemap to all relevant search engines to help them discover and index the new URLs.
Step 4: Make sure to configure Google Search Console properly (GSC)
Set up a new property in Google Search Console for the new domain. Verify that the property is set up for the correct version, accounting for any differences in HTTP vs. HTTPS and www vs. non-www. Check in the GSC settings that your website ownership is still valid after the move.
Additionally, submit both the old and new sitemaps to notify Google that the old site has been redirected to the new one.
Step 5: Update internal links
Ensure that internal links on the new site point to the correct locations on the new site rather than the old one. Adjust new internal links to ensure your website visitors do not encounter any unavailable links.
During the staging phase, also ensure that internal links are automatically updated in case of a domain change.
Step 6: Update backlinks and old URLs on other channels with the new ones
Reach out to owners or managers of websites that link to your own and make sure their links are updated. Also review and update the URLs for all backlinks you shared or inserted on other channels such as social media and email. If backlinks continue to point to old URLs, users may encounter broken links or be directed to outdated content, which can negatively impact user experience and cause traffic loss.
Monitor your site after migration
Keep a close eye on search and referral traffic. Check traffic daily for at least a week after the migration to identify any issues that may arise. Here are some key areas to pay attention to:
- Crawl the website again to identify any new issues and fix them, especially 3xx and 4xx statuses.
- Check if tracking tools are properly set up. Verify that Google Analytics, Google Tag Manager, and Google Search Console are collecting data correctly and that the tracking code is installed on all pages of the new website. Use annotations to mark the migration date in Google Analytics so you can identify any performance changes related to the migration.
- Check the performance of your new site to make sure it is loading quickly with no major performance issues. Niteco Performance Insights can help you track every aspect of your site’s performance after migration, including Core Web Vitals, uptime monitoring, and synthetic testing from 23 global locations. Contact us to find out more.
- Keep control of the old site to make certain that any traffic or links pointing to the old website are redirected to the new website properly.
- Check that structured data markup (schema) has been preserved on the new site. Schema types such as Article, FAQ, HowTo, and Breadcrumb are used by AI-powered search surfaces like Google AI Overviews and Perplexity. If this markup is dropped during migration, your pages may stop appearing in AI-generated answers — a visibility loss that does not always show up in traditional rank tracking.
If your migration involved moving from one CMS to another, the post-launch period is also a good point to cross-check against Niteco's guide on best practices for a seamless website migration to confirm no technical steps were missed.
Planning a full platform move?
Niteco's website replatforming service covers the full scope of moving from one CMS to another, including content migration, integration transfer, and QA.
In conclusion
Website migration can be a daunting process, but it does not have to be a nightmare for your website’s SEO. By following this site migration SEO checklist, you can ensure a smooth transition to the new website while maintaining or improving your search engine rankings.
For more information, check out our checklist for launching a new Commerce site. If you are planning a platform move, our website replatforming service and our guide on website migration best practices are useful next reads.
Contact Niteco to find out how we can help you with your website migration and all other SEO needs.
FAQ
SEO migration is the process of ensuring that a website retains its search engine rankings, domain authority, and indexing signals when undergoing significant changes — such as a domain change, URL restructure, CMS switch, or full replatform. Without an SEO migration plan, a site redesign can cause organic traffic to drop and take months or years to recover.
Recovery time varies significantly. A study of 892 domain migrations found the average recovery period is around 523 days, and approximately 17% of sites never returned to pre-migration traffic levels. Well-planned migrations with complete 301 redirect maps can hold traffic stable or experience only a short re-indexing dip. The more URLs involved and the more the URL structure changes, the longer recovery tends to take.
A 301 redirect signals to search engines that a page has permanently moved to a new URL. It passes the majority of the original page’s link authority to the new URL. A 302 redirect signals a temporary move and does not reliably pass link authority. For site migrations, use 301 redirects for all permanent URL changes.
Migrating everything at once is generally preferable if you have a complete redirect map and a tested staging environment. Staged migrations can extend the period during which search engines deal with mixed signals across old and new URLs. However, for very large sites, a phased approach may be necessary. In that case, ensure each phase has its own complete redirect plan and monitoring period before moving to the next.
Yes. Submit a new sitemap to Google Search Console as soon as the new site goes live. The new sitemap should list all new URLs. Keep the old sitemap live temporarily so Google can see the full picture of what has moved. Do not remove the old sitemap until you have confirmed that Google has indexed the new URLs.
Backlinks pointing to old URLs will follow your 301 redirects to the new URLs, and their link authority should transfer over time as search engines re-crawl those pages. This can take weeks or months for high-volume sites. Proactively reaching out to owners of high-value referring domains to update their links directly will speed up the process and reduce the period of authority dilution.
Structured data is machine-readable markup (typically using Schema.org vocabulary) that helps search engines understand your page content. Schema types like Article, FAQ, Product, and HowTo are used by AI-powered search surfaces — including Google AI Overviews and Perplexity — to summarise and cite content. If structured data markup is dropped or broken during a migration, pages may stop appearing in AI-generated answers. Check that all schema markup is present and valid on the new site using Google’s Rich Results Test before and after launch.
It can, though this is not the norm. A clean migration to a faster, better-structured platform can improve Core Web Vitals scores, fix accumulated technical debt such as orphaned pages and broken links, and consolidate authority that was previously split across redirect chains. Treat SEO preservation as the primary goal and any improvement as a secondary benefit that follows from solid technical work.
to transform your business and drive results?


